
User Manual
Create Single Post
Last Updated: July 15, 2026
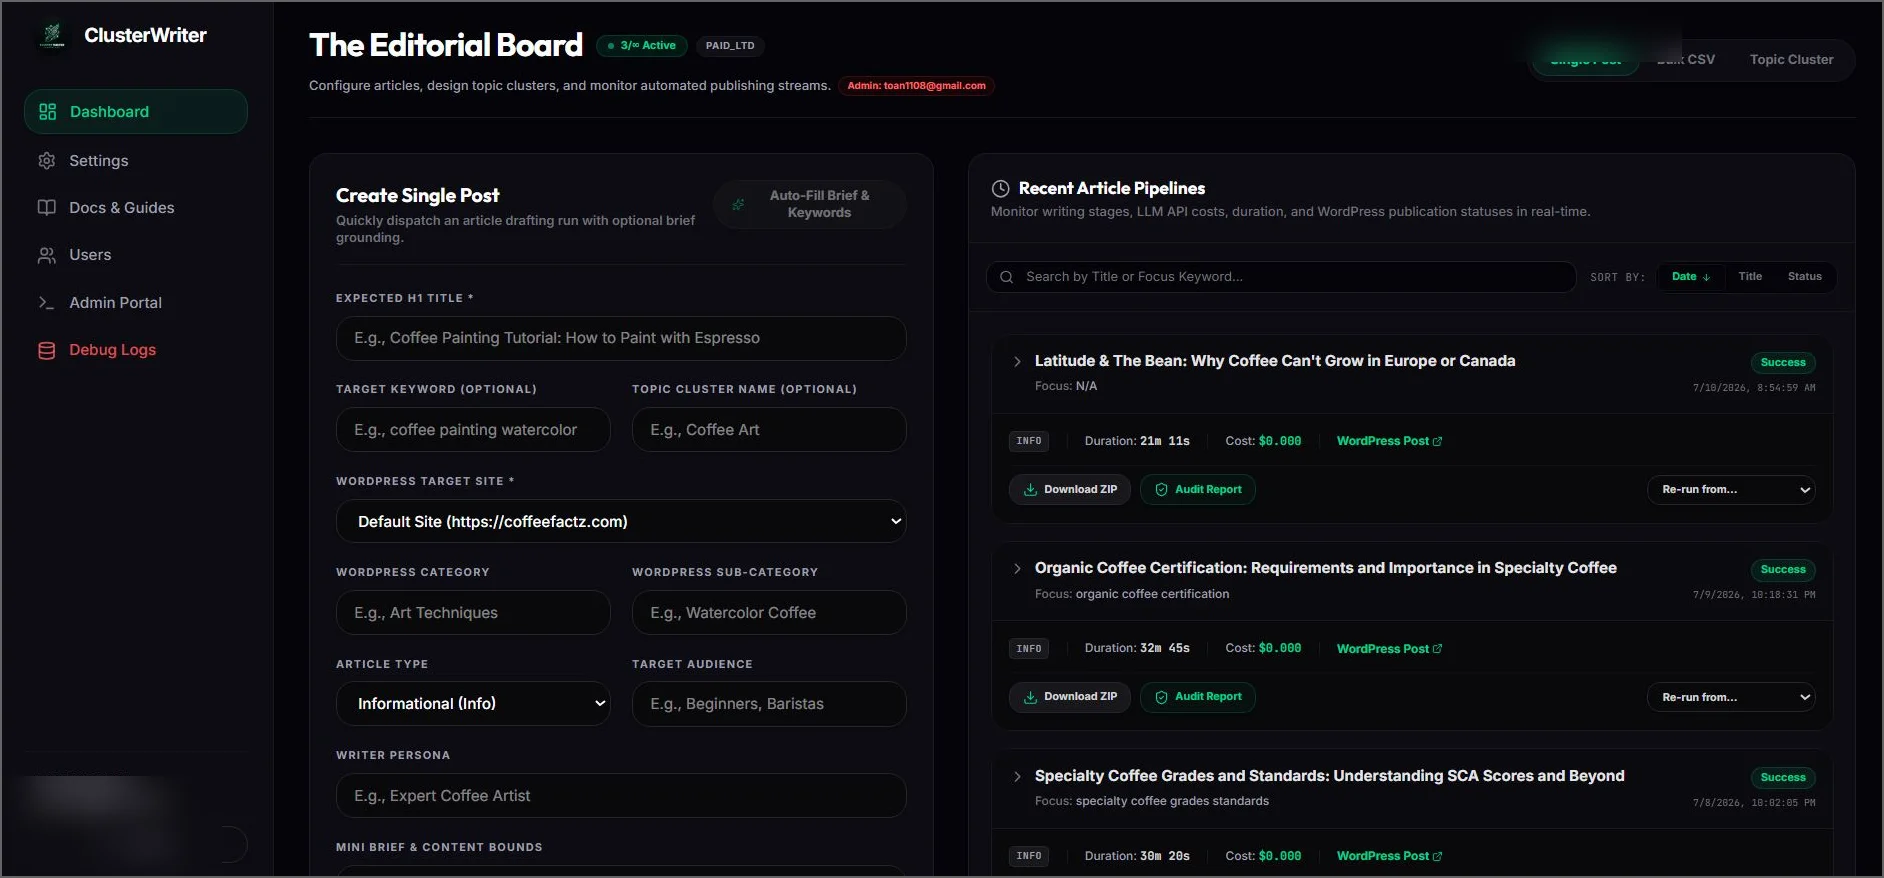
Figure 2.1: Single Post editorial settings panel.
The Create Single Post module is designed for SEO operators who need granular, absolute control over individual pieces of content. Follow these steps to configure and launch your first highly-optimized article.
Step-by-Step Configuration
- Idea Generation: Stuck on an angle? Click the Auto-Fill Brief & Keywords button (look for the Sparkles icon) next to the titles to generate data-backed keyword suggestions instantly based on standard SEO trends.
- Core Settings: Fill out the essential metadata to guide the AI writer:
- Expected H1 Title: The primary headline of the article.
- Target Keyword: The main search query you want to optimize salience for.
- Topic Cluster Name: The parent category tag to prevent cannibalization.
- WordPress Integration: Select your publishing destination directly from your connected properties:
- WordPress Target Site: The URL of the target blog.
- WordPress Category: Top-level category mapping.
- WordPress Sub-Category: Sub-category nesting to maintain clean URL taxonomy.
- Content Strategy: Define the tone and guidelines:
- Article Type: Choose from Informational, Listicle, Review, or Product Comparison.
- Target Audience: Guide the reading complexity level.
- Writer Persona: Adjust writing stylistic variables (e.g. Expert Copywriter, Tech Reviewer).
- Mini Brief & Content Bounds: Paste specific competitor outlines or keywords to exclude/include.
- Contextual Grounding: Feed the AI with proprietary research materials (like competitor transcripts, PDFs, or research papers) under the Grounding Research Materials (NotebookLM) file uploader.
- Advanced Toggles: Choose between standard or premium writing models, and configure dynamic outline nodes such as blockquotes, FAQs, external citation schemas, and key takeaways.
Launch
Once all fields are filled, click the Launch Pipeline & Publish button. The task will be sent to the Modal queues, and you can monitor the generation logs immediately on your dashboard terminal.